
Lakewood United Methodist Church Translucent Mosaic Window Restoration
![Translucent Mosaic Window Detail - [Illuminated From The Inside]](https://images.squarespace-cdn.com/content/v1/67a0cd1634781469450fb06f/1739021954371-P09B40EORHLGSDG2Q6PP/19b.jpg)
Translucent Mosaic Window Detail - [Illuminated From The Inside]
![Translucent Mosaic Window Detail - [Illuminated with Sunlight]](https://images.squarespace-cdn.com/content/v1/67a0cd1634781469450fb06f/1739021981044-QHRW1QEKX6CYKW68D10L/19a.jpg)
Translucent Mosaic Window Detail - [Illuminated with Sunlight]

Three-year total restoration of a 16-foot by 24-foot translucent mosaic window. Located at: Lakewood United Methodist Church St. Petersburg, FL.

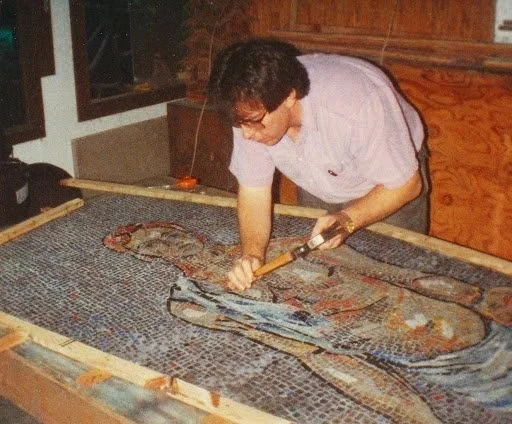
Each panel was removed from the sanctuary and taken to the studio for restoration. The first step was to remove the glass backing. Once the glass was shattered, it was heated with a heat gun to separate it from the epoxy. Each small piece of glass was pried up and scraped off with a thin chisel.

Once the glass was removed, the epoxy layer was heated with a heat gun to separate it from the mosaic tile. This was done inch by inch so the tile was not disturbed.

Each panel was pressed by hand until all of the bubbles were removed. The panels were then held in place by a bowed cross brace and shimmed to hold the panel in place and apply pressure without breaking the glass.

The plate glass was cast in strips to allow floating expansion joints. The mosaic window faced due east and the heat build-up from the morning sun was not taken into account in 1963. The panels needed to expand and contract freely.
Cleaning and Grouting

A final buffing of the tile gave it an extra sheen when being viewed from the inside of the sanctuary with the lights on.

After casting and cleaning, the restored panel, it was installed back into its refurbished frame. Neoprene spacers were used to cushion the glass and protect it from the steel frame. The tiles were cleaned again and polished. The final step was to apply a sealer to bring out the color.

Celebrating the completion of the last panel the night before installation.

After three years of restoration, the last panel was finally installed and secured into the window.
Get a Consultation
We’ll prepare a proposal and walk you through every step of the process.